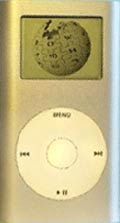
How to Install Wikipedia on Your iPod
Sponsored link I have an old 20GB iPod and even though I have a lot of music on there, I am only taking up half of the space available. So there’s another 10GB kicking around doing nothing and so I decided to start putting some useful iPod tools on there for when I’m on the move. Some of that space was allocated for installing one of my favourite websites - Wikipedia.
 Yes that’s right. You can now have the entire Wikipedia encylopedia on your iPod. Clocking in at only 1.7 GB of space, it is a very handy tool if you have the sudden uncontrollable urge while out at the shops to discover the capital of Mongolia or the mating habits of eels. The Wikipedia file is updated approximately once every 6 months so you won’t have the most up-to-date version but hey it’s free and Mongolia isn’t going to change their capital anytime soon.
It’s very easy to set this up but the actual Wikipedia file is so huge that it takes a long time to download. I have been waiting for 35 minutes and the download is only at 40%. So be prepared to wait a while for the file to be finished.
1. First connect your iPod to your computer and fire up iTunes. Then make sure the box “enabling disk use” is ticked. This is extremely important otherwise you won’t be able to move any files on there. Then close down iTunes.
2. Download the program installation wizard and install. Make sure your iPod is still plugged into your computer as the program installation wizard will automatically detect your iPod presence and install everything directly there.
3. One important thing to remember during installation is that you will be asked if you want to make the Wikipedia your “default system” on your iPod. This means that when you switch on your iPod each time, do you want to see your music menu or the Wikipedia menu? I recommend you say no to making Wikipedia the default view.
4. When the installation is complete, eject your iPod from your computer.
5. Now is the time to see if the installation worked. You need to reboot your iPod which you achieve by holding down the play button and the menu button together at the same time for 5 seconds. You will then see the Apple logo which is the iPod re-booting. When you see the Apple logo, press down the re-wind button for 5 seconds and this kicks in the new Wikipedia section of your iPod.
6. If everything looks OK, you now need to download the huge 1.7 GB Wikipedia file. When it is downloaded, go to your iPod folder on your PC, specifically to “data\encyclopodia\library\” and place the file in there.
7. Again, eject and re-boot the iPod, use the rewind button to go to your Wikipedia section and see if the Wikipedia file works properly.

To make a search, just use the scroll wheel to choose letters to spell your search term (just like you would choose the keys on a mobile phone to type a SMS message). Then press the “play” button to start searching.
A few extra pointers:
*When accessing the Wikipedia file on your iPod, you have to go into “settings” first and alter the screen contrast and the wheel sensitivity. It will be totally off-whack the first time you access it.
*The older your iPod, the slower it will be to retrieve information from the Wikipedia file. Your iPod might even crash, prompting you to re-boot. So this works best with the newer iPod models.
*Every 6 months or so, download the Wikipedia file again so you get the latest version. However, saying that, the current file is dated February 2007 so maybe once a year is more accurate!
*When you are in the Wikipedia section, pressing the menu button turns the back light on. The back light will stay on until you switch it off again so you can read the text easily. Be aware though that having the light continually on is a real battery drainer.
*To get back to your music section, you need to reboot the iPod again by holding down the menu button and the play button.
Labels: Ipod
0 Comments:
Previous Posts
- PANASONIC SHOWCASES WORLD’S FIRST* PROTOTYPE OF 32...
- Listen to the Music from Your iPhone in the Car wi...
- Sony Ericsson Announces Z555 Fashion Phone
- Sony Ericsson W760 Walkman Phone Packs with GPS
- New ROKR E8 Takes You from Talk to Music in One To...
- New Sony Ericsson W350 Walkman Phone Announced
- New Motorola Z10 Delivers Filmmaking on the Fly
- MOTORAZR2 V8 Luxury Edition Now Available Exclusiv...
- Privacy Policy
- OpenMoko Unveils Neo FreeRunner

Post a Comment